Friday, December 23, 2011

Merry Christmas! (My 100th Post!)

  Today is my last post for this year. It's also my 100th post. What a rewarding few months of blogging this has been! I want to thank all my readers - new ones as well as those who have been with me from the beginning. I'm so blessed to be doing what I love & sharing it with all of you. Thank you for reading.

  In the new year, you will start to see some changes around Silver Boxes. I've decided to cut back a bit on the amount of postings I do in a week. I'm going to try three a week & see how it goes. Monday, Wednesday, & Friday will be the new schedule. I'll let you know if things change.

~~~~~

  As we head full long into the heart of the Christmas season, let's remember the reason for our celebrations - Jesus. God sent His only son to the world, to live a sinless life, to die on a cross, to rise from the dead, & to be the Redeemer of the human race. 


  Jesus wants to be your personal Saviour too. This Christmas, open your heart to Jesus. If you haven't already, ask Him to forgive your sins & make you one of His children. When you do this, you will truly experience the true reason for Christmas.
~~~~~


  From our family to yours, we wish you the very merriest of Christmases & a wonderful New Year! 
Enjoy every moment with your family & friends. I'll see you in 2012. 

Love,

Thursday, December 22, 2011

Glittered Pinecones

  My very last Christmas project... what a month it's been! Don't get me wrong - a very fun month, but a very busy month. There were so many great things shared out in blog land. No shortage of inspiration, that is for sure.

  Back in November, I compiled a list of Christmas crafts I would like to try. Well, I am happy to tell you that I was able try my hand at all four. One, however, was a flop for me & so I am left with the remaining three. This is the final project... talk about leaving it to the last minute!

  Thankfully, these glittery pinecones are more of a wintery craft so I will likely keep them out into January & February.


  (If you're interested in the other crafts I did this Christmas season, check out the Spool Tree Ornaments & Toilet Roll Treat Packets I posted about. The wrapped candy canes I tried were a bust for me. I couldn't get them to look right. Bummer.)

  If you would like to make some of these, here's what you need:

  • pinecones
  • spray paint (I used white & silver)
  • white glue that dries clear
  • glitter (I used 'crystal')

1) Spray your pinecones very lightly with even, sweeping strokes. Let dry. Turn over & paint the other side. Let dry.  I purposefully didn't want mine totally painted. I wanted a bit of natural showing through.

I did a batch of white & a batch of silver, although it's hard to tell the difference in this photo.

2) Once the paint has dried, make a puddle of white glue on a piece of cardboard or something you don't mind getting glue on. I used whatever I could find in our recycling bin. 


3) One at a time, roll the pinecone in the glue, getting a bit on the tips. 


4) Shake some glitter over the glue spots. Let dry. 
You can also roll the glued pinecone in a 'puddle' of glitter. I poured, then when I had quite a bit sitting on my cardboard, I rolled to use some of it up.


I did steps 3 & 4 on each pinecone so that the glue didn't have a chance to dry before I got to them. If you're only doing a small amount, you could glue them all & then glitter them all.


5) After they've dried, use them however you would like in your decor. I'm considering making a pinecone wreath for next Christmas!

Little tip: I found this idea on Pinterest & had one of those "why-didn't-I-think-of-that" moments.
Use a cardboard roll as a vase filler!

via Dandelions & Dust Bunnies
Genius, right?


So, hidden in amongst the pinecones is a cardboard roll. :)


My last craft project for the year. Exhale. :)

Enjoy your day!

Wednesday, December 21, 2011

Egg Nog Tarts

  Christmas is almost here! What happened to the month of December? I really would like to know. Are you ready for the big day? Here's my list: Shopping (check!), wrapping (check!), decorating (um, almost), cooking (nope), baking... I can at last check off the baking from my list. This was the last recipe I made for this year's sweet collection.


Eggnog Tarts
makes approx. 2 dozen

1 package (6 serving size) vanilla pudding mix
1 envelope unflavoured gelatin
1/8 tsp. ground nutmeg
3 cups purchased eggnog

1/2 cup whipping cream, whipped

24 tart shells (I used purchased)
nutmeg for garnish

1) Bake tart shells according to package directions. Cool.

2) Combine pudding mix, gelatin, & nutmeg in a saucepan. Slowly stir in eggnog. Cook over medium heat, stirring constantly, until mixture boils. Remove from heat. Chill 1 hour or until almost set.

3) Beat pudding mixture until fluffy. Fold in whipped cream. 

4) Spoon into tart shells & refrigerate until completely set, about 2 hours.

5) Sprinkle with nutmeg.

6) Store in the refrigerator. 


I ran out of tart shells & had some leftover pudding. And let me tell you that it's very good on it's own too! :)

Have a wonderful day!

Tuesday, December 20, 2011

My Christmas Tablescape

  Last week I had the pleasure of doing a table "dress rehearsal" for our Christmas Eve meal here at the Richardson home. I received some beautiful Christmas ornaments for my birthday earlier this month as well as a lovely set of silver chargers & napkin rings that I put to good use on my Christmas table. 


I set the table just as a test run & the kids convinced me to keep it set & use it for our supper that night. 
Twist my rubber arm... :)


I made super fast place cards with coloured paper & a paper punch. 
Then I nestled them into the napkin folds with a mini ornament.


So this is what our table will look like for our Christmas Eve meal. Pretty simple but special.


We really enjoy eating beside our Christmas tree. We often talk about our favourite ornaments & where they came from. 
The kids constantly want to hear about their "first Christmas" ornaments. 
Stories are told of those first Christmases & our precious babies. 
Memories are relived & love wells up anew for our treasured family.
We're so very blessed.

Here's to many more Christmas dinners & many more precious memories!

Enjoy your day!
Check out these great parties I link up to!


Monday, December 19, 2011

Nutcracker Suite

    Please tell me, do you have any special Christmas collections? Maybe snow globes, cookie cutters, or trees?

  I've been collecting nutcrackers for about 20 years now. Ever since my mom took me to the Nutcracker ballet when I was a teenager. That year, I bought my first nutcracker & it has carried on ever since.

  It's a special collection that I bring out only at Christmas time. Usually, I set it up on the top of my antique upright piano.


The grandfather, Clara with her nutcracker, & the Mouse King from the original Nutcracker story


My favourite nutcrackers are the knights (one of them is on the photo on the left) & Robin Hood (right). 


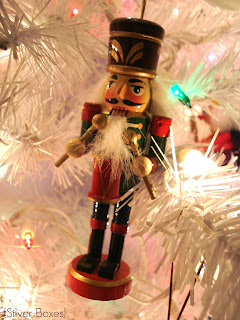
Since we bought a small white tree for our family room this year, I've included my nutcracker ornaments on it. I love how the colours pop off of the white!


  I hope this last week before Christmas is special for you as well as productive. 

Enjoy your Monday!
Click Here to see the great link parties I'm linkin' up to!

Friday, December 16, 2011

Cajun-Spiced Party Mix

  You know those go-to recipes you have that are the best you've ever tasted, no matter how many you try? This is one of those recipes for me. My mom started making this party mix when I was in high school & when I got married & left home, this was one of the recipes I copied out from my mom's recipe collection.


Cajun-Spiced Party Mix
makes approx. 20 cups

1 1/2 cups butter
3 Tbsp. worcestershire sauce
2 1/4 tsp. garlic salt
3/4 tsp. white pepper
3/4 tsp. cayenne pepper
3/4 tsp. black pepper
3/4 tsp. hot pepper sauce, such as Tabasco

5 cups small pretzels
4 cups crispix cereal
4 cups shreddies cereal
4 cups cheerios cereal
3 cups pecan halves

Preheat oven to 300º.

Mix butter, worcestershire, hot sauce, & spices in a saucepan. Over medium heat, stir until butter melts.


In a large roaster, mix remaining ingredients.


Drizzle butter mixture over cereal mixture. Toss.


Bake for 30 minutes stirring after 15 minutes.


Spread on foil to cool.


Pack in airtight containers.


~~~

This makes a great teacher, hostess, neighbour gift as well! A nice jar or tin makes the perfect container. 
Just tie on a bow & add a tag with the recipe name printed on it. Done!

Enjoy your day!
Linkin' Up:


Thursday, December 15, 2011

Cardboard Roll Treat Packets

  Do your kids ever save toilet paper rolls "because we might be able to make something with them"? Mine sure do! Most of the time, I sneak them into the garbage when they aren't looking. For the past couple of months, however, we have all been saving any kind of cardboard tube on purpose.

  My son & I had the idea that we could make some kind of treat packet for his classmates at Christmas time. We finally saved enough tubes & this week we got to work! Here's what we came up with.


  I had thought that I may want to do something a little more fancy with a cut out tag attached or something & then had second thoughts. Realistically, these are 7-9 year old kids who likely will just tear it open to get at the candy inside. :) 

  So, we made it look as special as we could without spending too much time on this project.


  Here's what we used:


  1. small bags of candy
  2. toilet paper rolls or paper towel rolls cut smaller
  3. pretty Christmas paper
  4. string, yarn, twine, or heavy thread
  I hope I'm not insulting your intelligence by describing this for you, since it was so simple. 

  We started by stuffing the bags of candy into the rolls.


  Next, cut your paper into strips & adhere around the roll.


  Lastly, loop the string around the tube several times & tie in a knot.


  If your kids are in my son's class, please don't spoil the surprise, k? It was pretty easy & my little guy is excited to have treats that he helped make.

  Are you making something for your kid's friends? What do you have planned? I'd love to know about it. Please leave me a link & I'll come check out your projects.

Enjoy your day!
Linkin' Up:

Wednesday, December 14, 2011

Light Bulb Snowmen - A REAL Tutorial

  At the end of November, I posted some pictures of a Christmas craft I had made with my mom & sister-in-law a few years ago - Light Bulb Snowmen.


  My sister-in-law, Jodi, offered to take some pictures of her next batch & she ended up providing me with a very nicely detailed tutorial. A very special thank you to her for that!! Right now, she's not a blogger, otherwise I would totally link you to her blog!

Here are her awesome instructions:

"Use an old shoe box and make holes to put bulbs in.  This makes the spraying and painting process so much easier.  


Spray lightbulbs with Acrylic sealer so paint will stick to glass.  


Paint bulbs with Acrylic paint.  I do 2 coats for best coverage.

The Finished bulbs.  I tried an iridescent paint paint, but realized I needed to do a first coat with white paint and then the iridescent as it didn't cover well on its own.  


This is the paint I use.  


I lay out all my felts and pom poms to coordinate.  The large pom poms are for ear muffs, the little ones for noses.  One colour will be the hat, the other the mitts and trim or whatever you wish!


I roll the bulb onto the felt to make a template for the hat. 


Put hot glue on the metal part of the bulb and wrap the felt around.   


This is the strip for the trim.  Again put a bead of hot glue on the hat felt and wrap the trim around.  


Tie string or yarn around the felt so that it is tight.  I coordinate my string to match my colours.  


Carefully cut the hat felt into strips.  Do not cut into the tie as you will cut it apart. 


It ends up looking like a funky toque!


Take a smaller piece of felt and fold it.  Cut a mitten shape out of the folded felt so that both mittens are the same size and shape.  


Use the large pom poms for ear muffs.  Attach with hot glue.  


  Use googly eyes and the tiny pom poms for noses.  Attach the mittens with hot glue.  You may also want to attach a saying or mini decoration to the front of the bulb.  


  I attach a string to the mittens and wrap it around the back.  This makes it look like the mittens are connected. 


The finished product!!  Enjoy!"


Thank you again to Jodi for putting this tutorial together for me! Aren't these so cute?!

Thanks for reading.
Enjoy your day!
Linkin' Up:

Blogging tips