

I had a number of requests for a tutorial on how to make them, so here we go!
Just a fair warning: this post is very photo heavy so you can see the instructions rather than just reading them.
Supplies:
2 sheets of 12x12 cardstock
1 or 2 sheets of patterned paper (or large scraps work too)
Adhesive
Paper scorer
Paper cuter
Ruler
(Remember those old stories on record that you used to listen to? I feel like saying, "You will know it is time to turn the page when you hear the chimes ring like this... brrrriiiiing! Let's begin now.")
1) Cut one of the sheets of cardstock down to 10x12. Discard small strip.

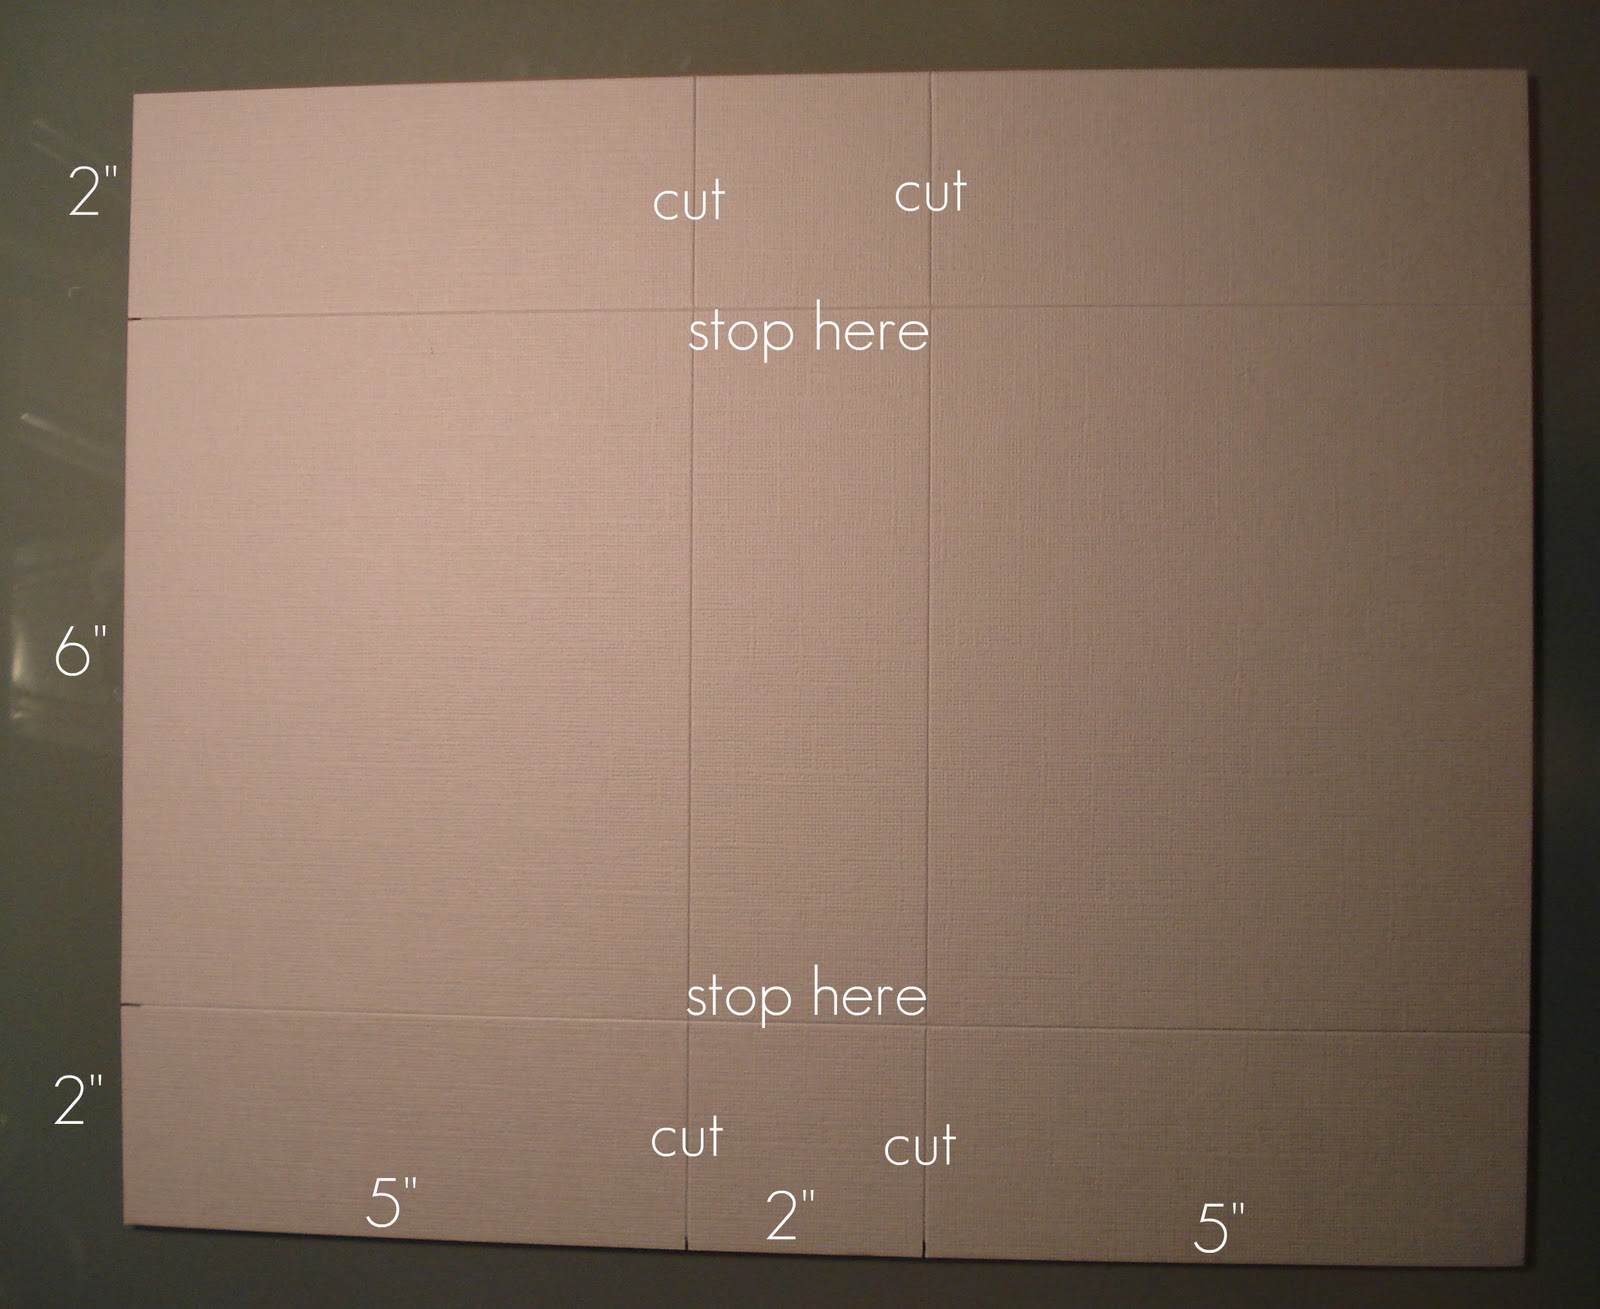
2) Measure & score according to the following diagram:

This is what it should look like after you've cut:

4) Now fold all the scored lines.

5) Fold in small squares & start adhering the box together
 |
| These squares will be on the inside of the box. |


There. You're done with the bottom of the box for now.
Now the lid.
1) Start with your second piece of 12x12 cardstock. Trim it down to 6 & 1/8 x 10. You need that extra 1/8th of an inch because if you don't have it the lid won't fit over the bottom.

2) Measure & score as shown below.

3) Cut the sides according to this diagram.

It should look like this:

4) Fold the scored lines & start putting it together as you did the bottom.


Here's the box. Now it's time to decorate!

I keep it simple by adding some co-ordinating paper to the top & the bottom. You really could do whatever you wanted though. In the past, I've added tags, brads, ribbon, buttons, & rub ons. You can do as much or as little as you want.

The finished product!
If you are still reading, please let me say thank you & congratulations! Once you make a few of these, it will be old hat & you'll be able to mass produce at a whim.
If you have questions please let me know & I'll do my best to answer. Thanks for sticking with me through all those photos & measurements!
Enjoy your day!

Linkin' Up:
Stephanie, you are a dear for putting this altogether....and I gotta tell ya this visual gal is loving all the pics along with the written instructions. You rock! I will be making cards and boxes to give as gifts to family. Once I make them i will be doing a post a linking back to you. Thanks again. : )
ReplyDeleteThank you for sharing this great tutorial! I just started papercrafting with my Silhouette and was looking for a fun way to store my creations. You make it look very easy to put together. Can't wait to make one!
ReplyDeletethese are awesome! thank you so much...can't wait to make some!
ReplyDeleteVery nice tutorial. Clear and to the point!
ReplyDelete