Showing posts with label Cleaning. Show all posts

Wednesday, June 27, 2012

The Dish Soap Challenge. Week Six: Walls


This Dish Soap Challenge is rocking my cleaning world! I have yet to be disappointed by this stuff! 
Okay, I guess I just blew the outcome of today's challenge...
Oh well, you were bound to find out soon anyway. :)


So, I was working on washing the walls around our house last week. With all the little fingers that touch these walls, I have to clean them several times a year. 

At this time of year, the walls are usually particularly bad because the kids are outside gettin' dirty!


It's kind of hard to tell, but can you see the dirty fingerprints on the photo above?


I used the same rule as I did with the windows from last week's challenge: Fill the bucket with lukewarm water, THEN add a couple drops of dish soap & mix with your hand. 

Wipe off with a clean rag & watch the dish soap do the work. It took off the minor scuffs too. There are some bigger scuffs that it didn't remove, but I'm okay with that. The other cleaners I've used in the past don't remove them either. I've always had to use a Magic Eraser for those.

To check out the other stuff I've tried dish soap out on, click on these links:

Thanks for reading! Enjoy your day!


Wednesday, June 20, 2012

The Dish Soap Challenge. Week Five: Windows

  I've been working on finishing off my spring cleaning list in full force for the last few days. It's still technically spring, right? Well, for one more day anyway. I've been able to cross off several big tasks off of my lists. And yes, I actually did the work, I didn't just cross it off. ;)

  Continuing in the theme with my Dish Soap Challenge, I decided to use dish soap to clean my windows. I did a bit of "googling" about it before hand to see if this is at all common. From what I read, some professional window washers use it all the time! Did you know that? I. Did. Not. But I'm happy to know now!


  There are a few tricks to keep in mind when using dish soap to wash windows:
  • First of all, you should know that if you clean your windows with the sun shining on them, you will almost always end up with streaks. It was sunny on the day I cleaned my windows so I did the back of the house first (it was still shady there), then in the afternoon when the front of the house was in the shade, I did those windows. Or you can just wait for an overcast day to do it.
  • Fill your bucket with lukewarm water FIRST, then add just a couple drops of dish soap. Then mix it with your hand. This is one case when the bubbles & suds can work against you.
  • Use a squeegee & a dry, lint free rag.
  • Use the squeegee to wash & squeegee the window. Then wipe any stray drops of water with the rag.
Your windows will look amazing!

It's hard to see all the spots on the window in the before shots, but trust me, after going through another Saskatchewan winter, these windows are dirty!


  SUCH great results!

To check out the other stuff I've tried dish soap out on, check out these links:

If you enjoy my blog, please consider following along / subscribing. Thanks for reading! 

Enjoy your day!


Wednesday, June 13, 2012

The Dish Soap Challenge. Week Four: Sinks


Wow, I can't believe it's week four of my Dish Soap Challenge already! June is flying by!


This week I tackled my dirty sinks with dish soap. I've actually used dish soap on my kitchen sink for years simply because it's always handy. :) I've always been happy with the results.


Before

After

Even though I've used it with great success on the kitchen sink, I'd never used it on the bathroom sinks... 
until this week, that is.

Before

After

It's kind of hard to see any difference between these two photos, but the dish soap really made things sparkle & shine.

Another success!

  If you've missed the first three weeks of my dish soap cleaning challenge, check out these links:


Thanks for reading.
Enjoy your day!


Wednesday, June 06, 2012

The Dish Soap Challenge. Week Three: Patio Furniture


  In doing this dish soap challenge for the past few weeks, I'm feeling like dish soap is my new cleaning BFF. It's been so amazing! I haven't been disappointed yet!

  For those just tuning in, I've issued myself a challenge to start doing my cleaning with dish soap wherever I can. Every week for the next while I'll clean something new with dish soap & see how the results stack up to the results using a more expensive, specialty cleaner. I'll use my home as the guinea pig & let you in on the results.


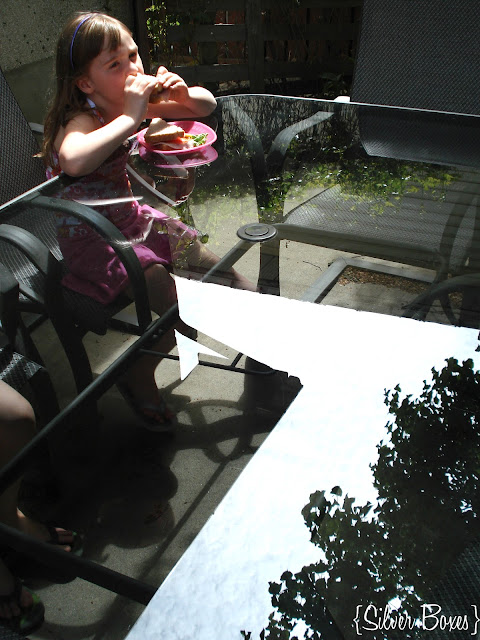
This past weekend was so beautiful & warm, we simply had to eat outside on our patio at every possible occasion. 
We had taken out our patio furniture this spring, but hadn't yet cleaned it off or used it.

After weeks of rain, wind, dust, & birds (if you get my drift), this is what the table looked like:


Blech! I think I'd pass on a meal at this table!

After simply squirting a small amount of dish soap into a pail & adding some warm water, the kids & I washed off our patio table & chairs.

We dried them off with a dry rag & here is the end result:


A gloriously clean patio set to eat lunch at!

Verdict: We're 3/3. I'll be using dish soap to clean outside again.

If you missed the first two instalments of this experiment, please visit:
Enjoy your day!


Monday, May 28, 2012

The Dish Soap Challenge. Week Two: The Toilet

Here we are at the second week of my dish soap cleaning experiment. If you missed the first experiment, allow me to explain. 

I'm issuing myself a challenge to start doing my cleaning with dish soap wherever I can. Every week for the next while I'll clean something new with dish soap & see how the results stack up to the results using a more expensive, specialty cleaner. I'll use my home as the guinea pig & let you in on the results.

If you missed week one, you can find it here as well as get a little more in depth explanation.


This week, I set aside my regular toilet cleaner & got out my trusty dish soap. 


After learning my lesson last week, I added only a little bit of dish soap to the toilet bowl & cleaned as usual with my toilet brush.

Before

After

Verdict: I plan to keep cleaning my toilet this way. Dish soap got the toilet just as clean as a toilet bowl cleaner.

  I know many people are concerned with always having anti-bactirial cleaners. I am not one of those people. :) People have lived for years using simple ingredients to clean their homes. I believe we can continue to do the same without detriment to our health & homes. 

  So, if cleaning your toilet with dish soap freaks you out because you like every germ to be accounted for, dish soap may not be the toilet cleaner for you.

For me, the dish soap experiment is going well & we're 2 for 2!

Thanks for reading. If you like what you see here on Silver Boxes, feel free to become a follower, 
subscribe by email (sign up on the right sidebar), or follow along on FacebookPinterest, or Twitter
And please leave a comment when you do so I know who my new friends are! :)


Enjoy your day!


Wednesday, May 23, 2012

The Dish Soap Challenge. Week One: The Bathtub

  A couple of weeks ago, I heard about a blog called Squawkfox. Kerry has many tips on saving money & living frugally. One of the things that caught my attention was a list she has of many things you can do that can save you $1,000 per year. One of those things was to stop buying household cleaners. She says she uses a $1 bottle of dish soap to clean everything in her house. This had me seriously intrigued.

~ The Dish Soap Challenge ~

  So, after hearing that, I'm issuing myself a challenge to start doing my cleaning with dish soap wherever I can. Every week for the next while I'll clean something new with dish soap & see how the results stack up to the results using a more expensive, specialty cleaner. I'll use my home as the guinea pig & let you in on the results.


This week's dish soap challenge: My dirty bathtub.

Yes, you can see the dirty ring, right?

I started with the bottle of soap, above, & a scrubby sponge that is safe for porcelain tubs & sinks.

The dirty tub


So, after using a bit too much dish soap, here is our tub after being cleaned with dish soap:


Success!

Overall, I'm pretty happy with how this turned out. 
I started out by using too much soap, so there were a lot of bubbles. 

  Verdict: I plan to keep cleaning my tub this way. Dish soap got the tub just as clean as the bathroom cleaner I had been using. I also learned that a little dish soap goes a long way. :)

I hope this little series inspires you to save some money & try doing this too. 

Enjoy your day!


This post was featured on:

Photobucket

Friday, April 27, 2012

Mission: Kid's Toy Organization

As a part of our Easter break & spring cleaning, our kids & I had a mission:

To sort & purge all their toys, games, puzzles, books, & other loot.

Look at the mess that had been going on all winter...

Audrey's room:

Ponies, Princesses, & Pet Shops, oh my!


Messes scattered everywhere because all the storage space was full!


We came to this conclusion: they just had TOO MUCH STUFF

So, before we started, I explained to the kids what we were going to do & that they would have to make some choices as to what they wanted to keep & what they were willing to let go. 

As an added perk, I told them that if there were toys & other items in good condition that they no longer wanted, we could try to sell them on Kijiji & they could use whatever money they made for spending money on our vacation this summer.

I must say that the kids totally surprised me in the amount of toys & stuff they were willing to let go!
They did SO well!

Here are my daughter's bins after we sorted & purged...


I also googled & found pictures of the toys she wanted to keep. I printed off those pictures & used packing tape to label the bins so she can see what goes in each bin, since she can't yet read.


In the middle of the job, I ran out of tape, so that's why the top photo doesn't show them all complete. :) 
Off to the store for more packing tape!

Labels for her bins:
Purses
My Little Ponies
Littlest Pet Shops
Crowns & jewelry
Strawberry Shortcake
Balls
Doll accessories (bottles & clothes)
Tea set

I left a few bins un-labeled just because the toys that she had left really didn't fit into a "category". 
Those toys I leave up to her as to which unmarked bin she wants to put them in. 


Parker's room:


His toy bin was pretty full so the top of these drawers was always a dumping ground... 
hence the housecoat, gas mask, parrot, & play back pack... 
only in a boy's room would you find such a random assortment of items in any one place.


  After organizing all the books, toys, games he wanted to keep, throwing away all the broken toys, & making a pile of toys & books to sell or give away, here is my son's closet. 


Even though he can read, he was happy to have the picture labels on his toy drawers too.

Labels for his drawers:
Top - games
Middle - electronics
Bottom - colouring books, activity books, & markers

The rest of his toys go in the big bin on the left. He has a smaller, separate bin just for his lego as well.


All the other places that were dumping grounds are much neater. 
They are finding that it's a lot easier to keep things tidy when everything has a home that isn't overflowing. :)

Look at the huge amount of toys, books, games, & puzzles that the kids gave away or sold!


And because we all like before & after shots...


So much better!

And another thing I can cross off my spring cleaning list!

Enjoy your day!


Thanks for reading. If you like what you see here on Silver Boxes, feel free to become a follower, 
subscribe by email, or follow along on FacebookPinterest, or Twitter
And please leave a comment when you do so I know who my new friends are! :)


Friday, March 30, 2012

Spring Cleaning 2012

Have you begun your spring cleaning? I've done a few of the tasks on my list, but have lots left to do! 

In addition to my regular cleaning, here's my list:

Update: After talking to some friends of mine, it has come to my attention that you may think I do this whole list every year. While I strive to do my very best, alas, I don't complete this list every spring... ever! :) It is simply a guideline & something to work towards. Don't let it stress you out. :)


Wednesday, September 28, 2011

Tips for removing wax

  Have you ever splashed wax from a candle onto your coffee table? If you have, don't despair. It's very easy to remove from hard surfaces.

I did a little visual for you. (You're welcome.) :)

1) Spilled/splashed wax - Oh no! Wait until it hardens.

2) Get out your credit card or any plastic card & start scraping. It's just like scraping your windshield in the winter.

3) The wax comes right off. If there's a bit of wax residue, use a bit of soap & warm water to wash it away.
Super quick & easy.


  Another candle tip: If you like votive candles, but not the wax that is left over after they burn down, just take the candle holder that has the left over wax & put the whole thing in the freezer. Leave it there for a few hours. After it has frozen solid it will pop right out. If there is any wax residue, wash with warm, soapy water or if  your candle holder is dishwasher safe, put it in the dishwasher. Wa-la! Pristine candle holders once more! Be warned, however, that if your candle holder is wider at the base that at the top, you will have to break up the wax after it has frozen before it will come out. I use a paring knife to break it into a couple of pieces. If you try to force out the whole chunk of frozen wax you could break your candle holder, as I did once.

  I'm still working on how to get rid of wax from fabrics. I don't have that one down yet. :) I will let you know if I ever figure it out. If YOU know, PLEASE share your wisdom!

 On another note, our youngest child, our daughter Audrey, has her first day of school today. I'm having mixed emotions. She is absolutely ecstatic!

  I'm looking forward to sharing my bulletin board project with you tomorrow! I hope to see you then.


Enjoy your day!

Thursday, September 01, 2011

My project this weekend & a tip for cleaning your microwave

 I've had this little desk/side table for going on 6 years with the intentions of painting it. But up until this year, I wasn't sure exactly the look I was going for with it. I was talking about it with my mom (interior decorator extraordinaire) this spring & she gave me a great idea...


  She took me to Urban Barn & showed me a little cabinet with a black top (like my little table already has), silver sides & front, & a butterfly decal wrapped around the side. I have searched the internet, but CANNOT find a picture of the exact one she showed me. So sorry. This is the closest I could find:


Madame Butterfly Tall Cabinet by http://www.frenchbedroomcompany.co.uk/
Pretty, no?
  I'm not sure I'll add the butterfly to my table... what do you think? I'm thinking it might be too busy with all the displays I do on this table. I would also have to find a stencil or decal. Anywho, I bought some silver spray paint & it's on my to-tackle list for this long weekend. I'll show you the results next week. I'm going to the keep the top black & the chrome trim is also staying. I'm excited to see the results & to finally cross it off my list!


Introducing the Cleaning Tips column! 
(or "One of Steph's handy tips" as my husband calls them)


  In my cleaning detail today I noticed that my microwave was in need of a scrubbing. I learned this tip from the show How Clean Is Your House? & it works so well, I thought I would share.


 Fill a microwaveable bowl full of tap water. Quarter a lemon & add to water. Or in a pinch just add 1/4 cup of lemon juice.
  
  Put bowl in microwave & set for 5 minutes. After it has "cooked" for 5 minutes, let it stand in the microwave for an additional 5 minutes or so. Then, just wipe your microwave out. The steam loosens cooked on food & it just wipes away! And the lemon makes it smell fresh - bonus!


  Thanks for stopping by!


  Enjoy your day!
~Steph


Blogging tips